
73% of consumers are more likely to make a purchase after watching a video about your product…
So why not help your customer make a purchasing decision by making a tantalizing product video?
In this video/article I share my top 5 tips for making a product video that looks amazing! 🙂
Subscribe to download my 7 step promotional video sales formula PDF. Including my 5 instant sales motivators.
Discover how to get more leads and increase sales with online video 🙂
Product Video Making Tip #1 – Find a location that will compliment your product
In film it is said that your setting is your most important character.
Where you choose to film your product video will subconsciously say a lot about your product…
Take some time thinking about where to film your video and what your location will say about your product.
If you have a golf product then head out to a golf course or if you have a kitchen appliance shoot in a kitchen.
Choosing where to film is one of the easiest ways to make your product video look more professional.
It costs you nothing and yet it will have a big impact on the final look and feel of your product video.
Product Video Making Tip #2 – Use the correct settings on your camera
There are a few settings on your camera that will help you to get a nicer looking shot.
Camera Setting Tip #1 – Frame Rate for Slow Motion Shots
If you want to add slow motion shots to your product promotional video then you will need to shoot your video in at least 60 frames per second.
Not every camera has this feature.
Then when you are editing your video set the project file to 30 frames per second. That way you can slow down your shots by 50% before noticing any defects or skipping any frames.
Camera Setting Tip #2 – Set your shutter speed at least double your frame rate
If your shutter speed is too low compared to your frame rate it will create a strange blurry/dreamy look to your shot… Some film makers use this effect intentionally for creative effect.
However it is not ideal if you want to show off some clear shots of your product.
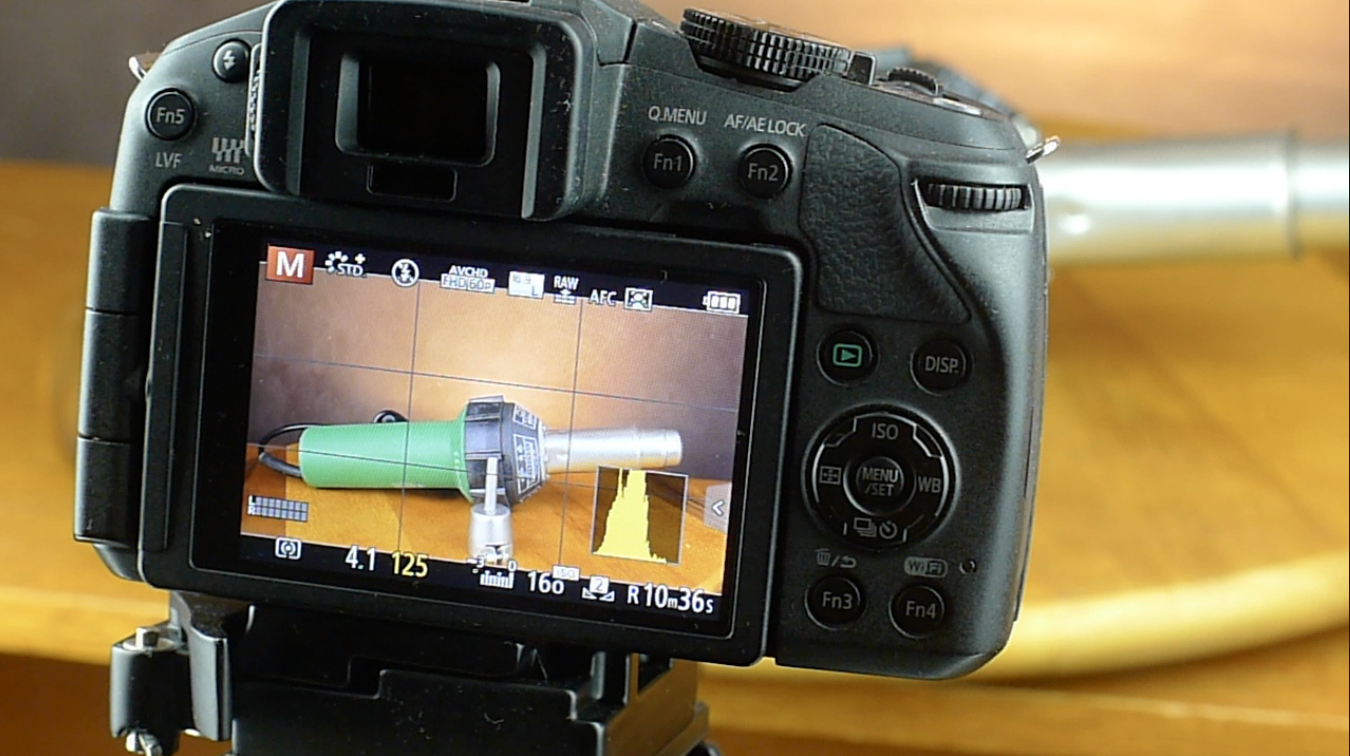
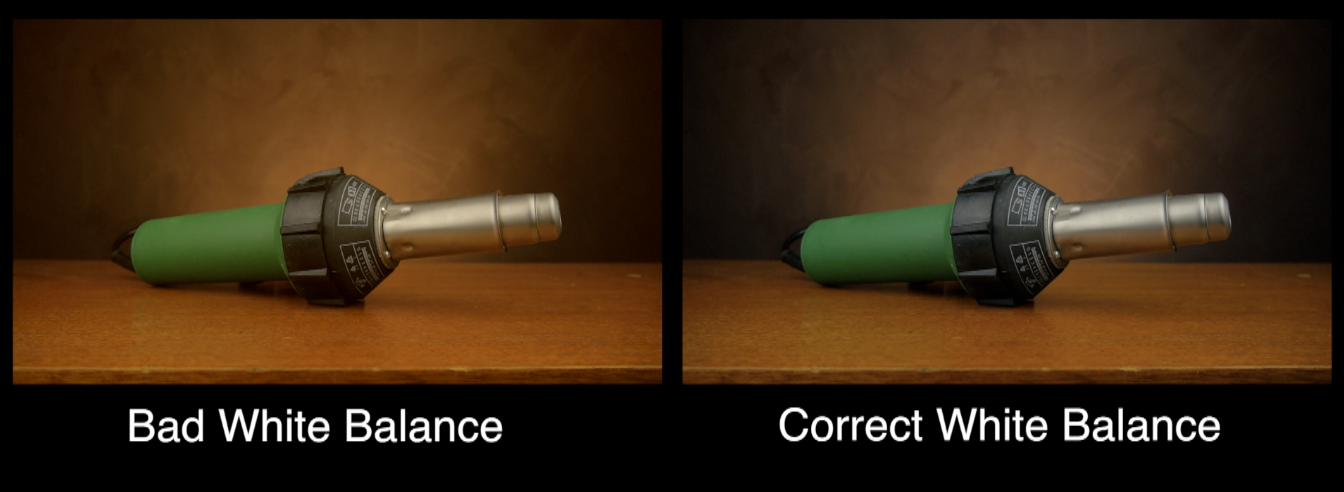
Camera Setting Tip #3 – Set your white balance
If you are using “auto” mode on your camera then your camera will try to set the white balance for you… Some cameras will do a good job… others not so much.
If you are using manual mode then don’t forget to set the white balance on your camera to suit your scene.
This will help to get the colours to “pop” and make sure that the colours in your shot reflect the colours in real life.
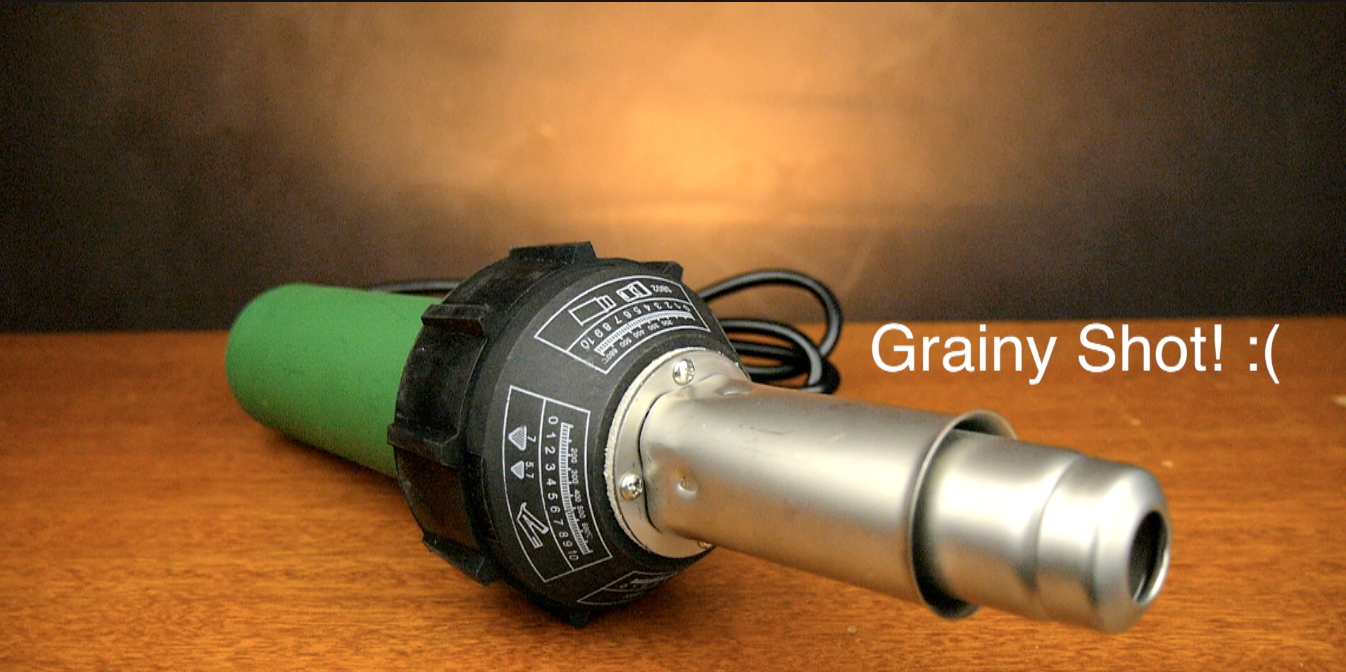
Camera Setting Tip #4 – Keep your ISO low
Increasing the ISO setting on your camera is a quick way to increase the brightness of your shot… However it can also make your shot look grainy 🙁
This is more noticeable on cheaper cameras.
To keep your shot looking nice and clear lower your ISO settings.
You may need to use more lights or bring your lights in closer to offset the lower ISO… But it can be worth it… Especially when using a cheaper model camera 🙂
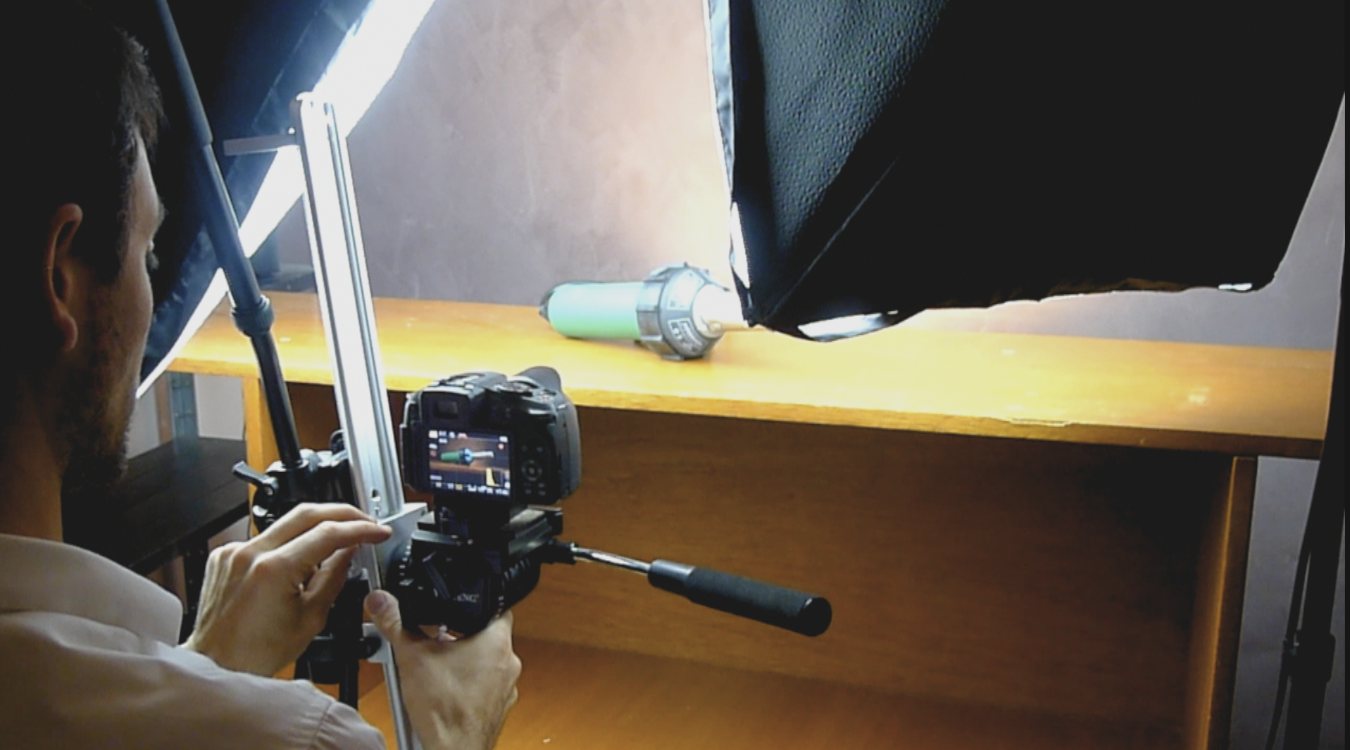
Product Video Making Tip #3 – Set up your lighting to suit your product
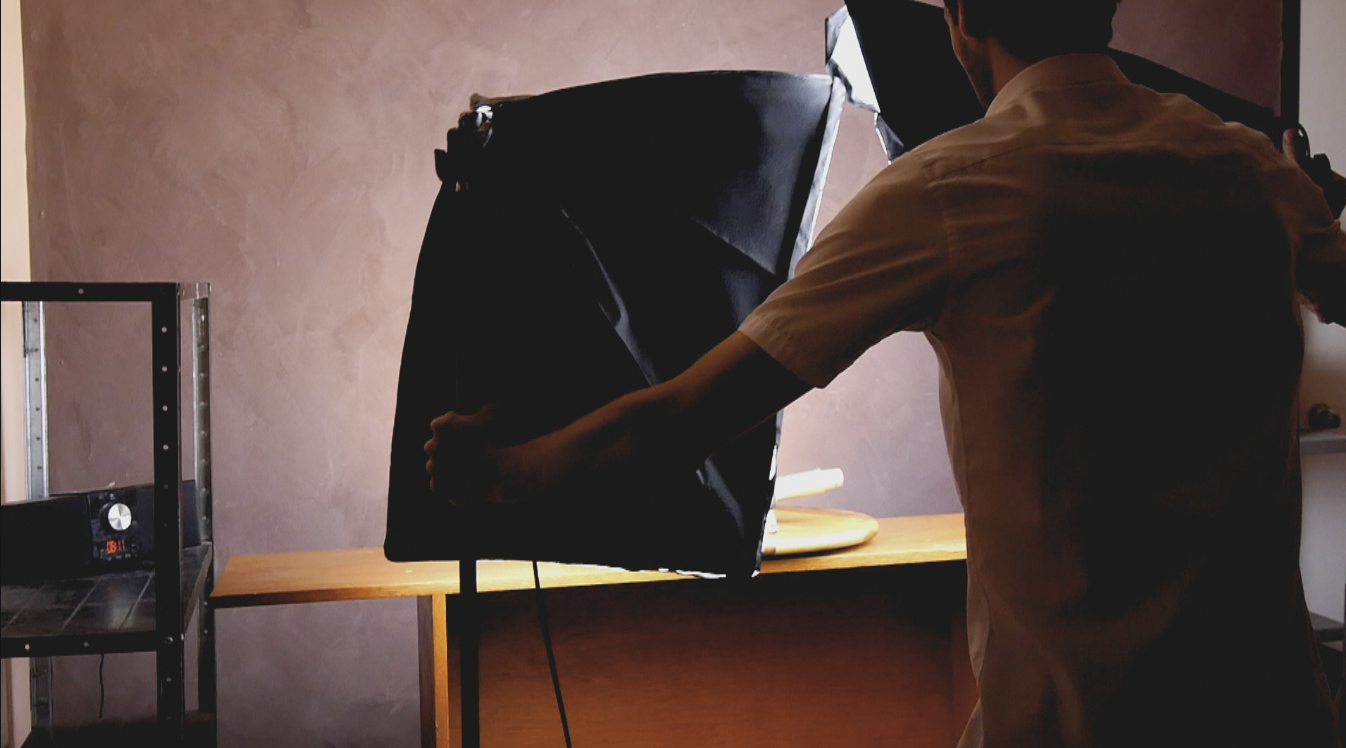
Lighting can help to tell the story of our product.
How you choose to light your scene will subconsciously convey a message about your product. For example:
Here is a short teaser promotional video that uses light brilliantly to make the product look rugged, adventurous and mysterious…
Similarly I wanted my shots to seem a bit more gritty and rugged to suit the branding of the tool I was promoting.
I used two light boxes to light my product and a third light shining up against the rear backdrop to create a slight gradient look to increase the depth of the shot.
If filming outside be careful of harsh sunlight. Sometimes on very bright sunny days it is best to film in the shade to get a cleaner softer light.
Product Video Making Tip #4 – Filming
Adding movement:
Adding movement to your shot brings life to your product video and can help you to show off the specific features of your product.
I used four tricks for adding movement to my product video.
Rotating Shot
For the rotating product shot I used a “Lazy Susan” to spin my product around in the shot. This trick is very easy to use and can be very effective.

Raising Shot
For the raising shot of the product I used my camera slider tilted sideways on my tripod.
Moving in and out
If you don’t have a turntable or a camera slider you can still get some nice “dolly” shots using just your tripod by rocking backwards and forwards on just two of the tripod legs.
Panning
I also got some nice camera panning movements by slowly rotating the tripod head. It is much easier to get a smooth pan if you have a “fluid” tripod head which is specifically designed for these types of movements.
Show off what your product can do:
Don’t forget to show off what your product can do. Seeing your product in action can help potential customers validate their purchase decision.
Product Video Making Tip #5 – Editing your product demo video
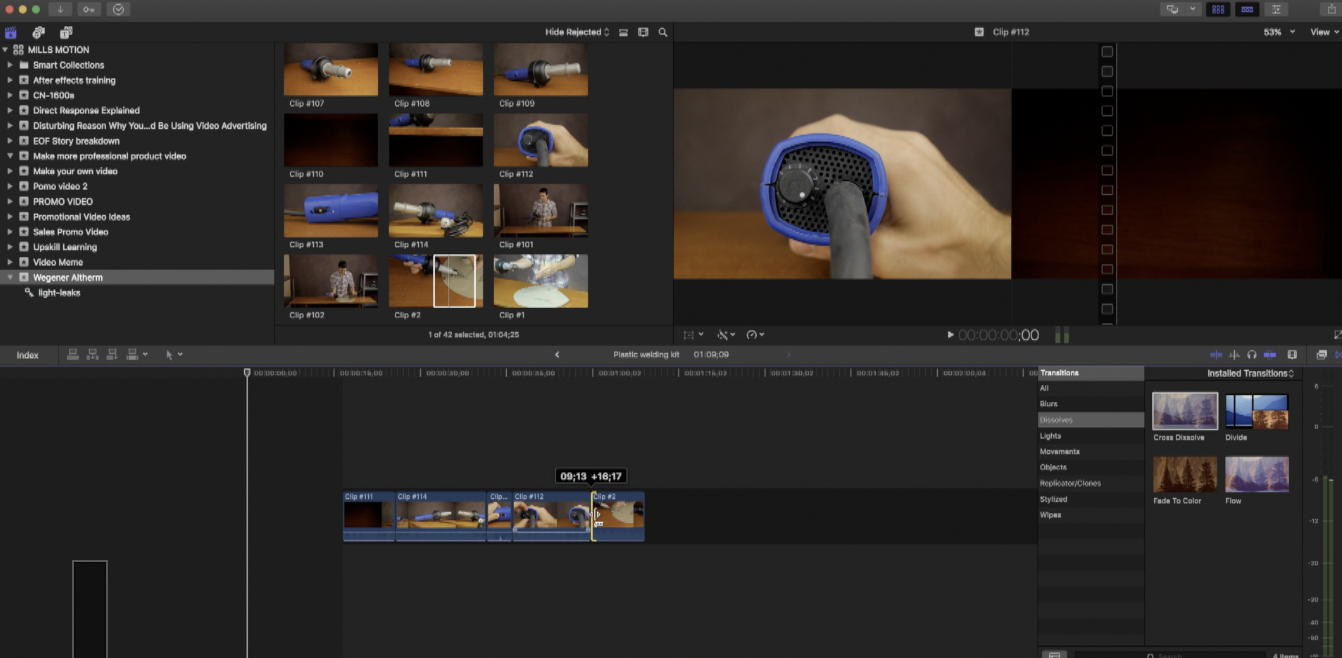
“Cut the fat… But don’t hold back”
The video I showed in my demo was actually only a small part of the product demo video that I created.
I always encourage people to cut out the unnecessary shots. However, don’t hold back from selling and explaining your product.
Serious customers will listen to every word you have to say because your product/solution is valuable to them.
I use Final Cut Pro X to edit my videos.
However, there are free programs that come ready with your Mac or Windows computer that will work fine for doing a basic edit or your product demo video.
Windows Movie Maker – Windows
iMovie – Mac